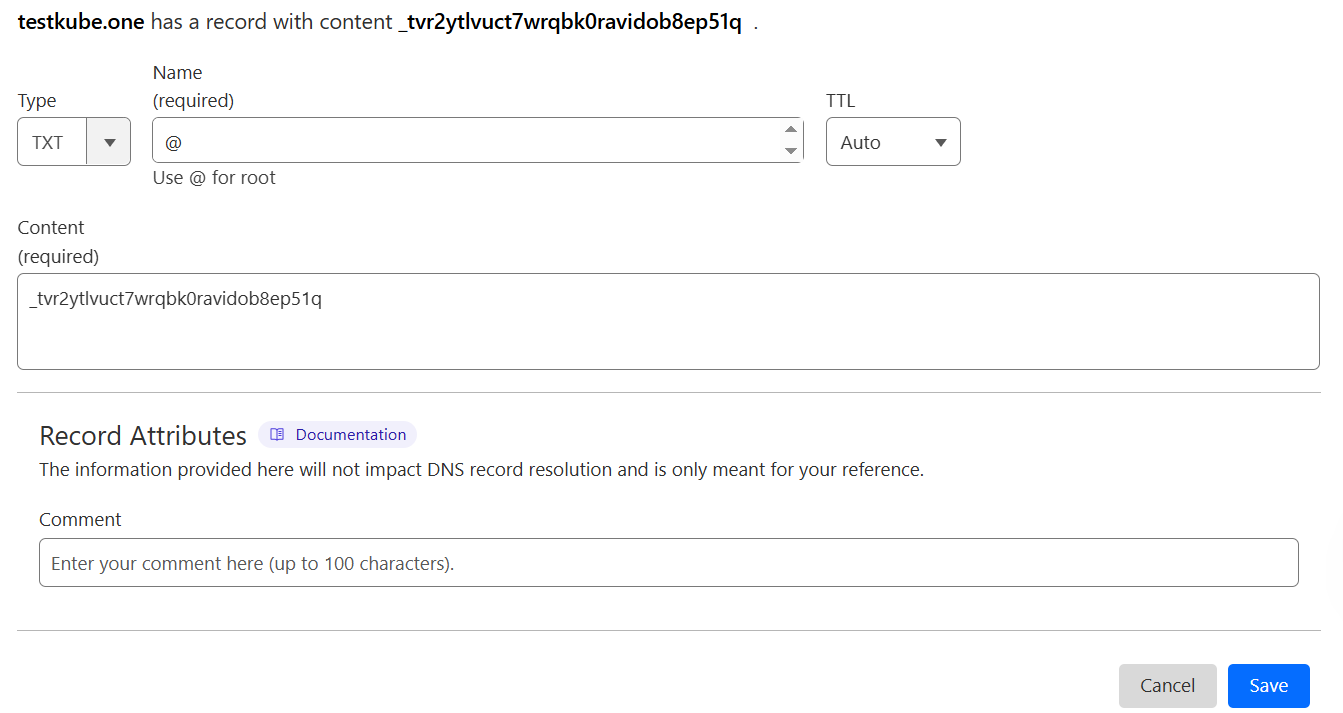
TXT Record for Validating and Revalidating Sectigo Certificates:- Navigate to Domains.
- Select the domain to be validated and click Validate.
- Select the DNS TXT DCV method.
- Click Start.
- Add the TXT record to your domain’s DNS settings.
Sign into your domain registrar’s website or your DNS provider.
Note: Your domain registrar’s website is where you purchased your domain.
- Locate the option to add a new DNS record, and select TXT as the record type.
- In the Label/Host field, enter the TXT Host/Label value provided.
- In the Destination/Target field, enter the TXT Target/Destination value provided.
- Save the changes.
- Click Submit.
- (Optional) Click Check Now to check the status of the DNS TXT record.
- Click Close.
- DNS CNAME Record
To complete domain verification using DNS, you'll need to add a CNAME or TXT record depending on your SSL vendor (Sectigo or DigiCert Family). Before your certificate can be issued, the new record needs to be viewable by the public using an online DNS lookup tool. It may take 24-48 hours for your record to propagate, which is outside our control.
CNAME Record for Sectigo (formerly Comodo) certificates:
- Log in to your domain's hosting Control Panel
- Select DNS Zone Manager.
- Create a new CNAME Record with the unique values from your certificate enrolment page.
- Set TTL to 3600 or set to default and save.
- Wait for the record to propagate.
If this method does not work, you can opt for an alternative verification method by selecting "Change Approver Method" on your Certificate Enrolment page.
CNAME Record for DigiCert certificates:
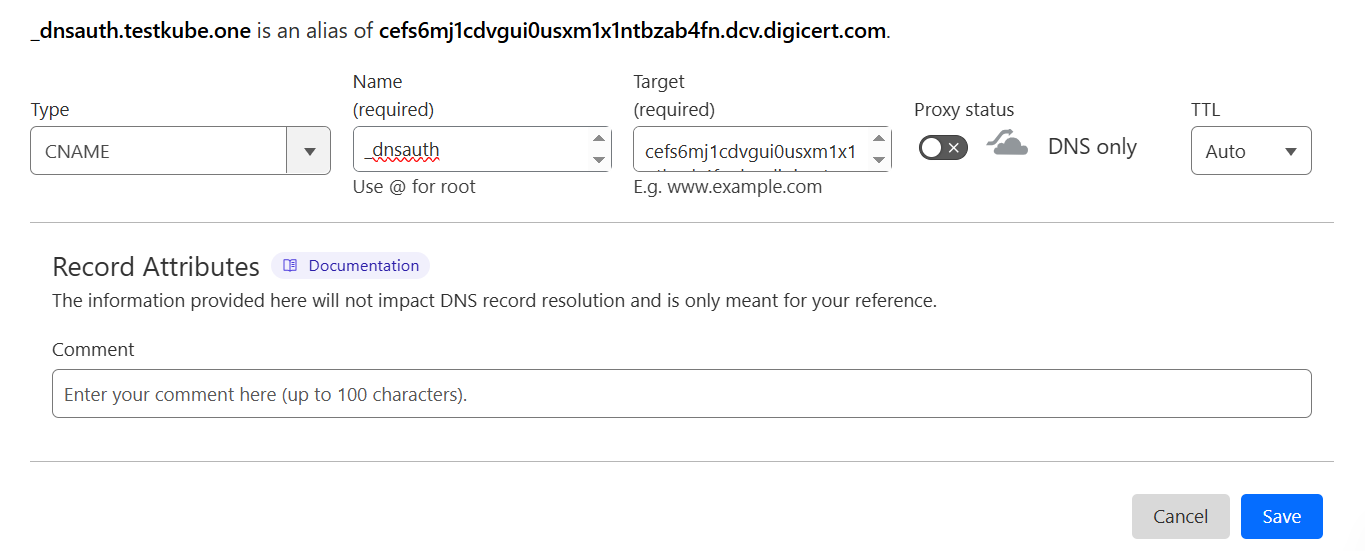
Option 1: Create the DNS CNAME record with the static prefix _dnsauth
- Go to your DNS provider’s site and create a new CNAME record.
- In the hostname field (or equivalent), enter _dnsauth.
- In the record type field (or equivalent), select CNAME.
- In the target host field (or equivalent), enter [random_value]. dcv.digicert.com to point the CNAME record to dcv.digicert.com.
- Select a Time-to-Live (TTL) value or use your DNS provider's default value.
- Save the record.
 Option 2: Create the DNS CNAME record
- Go to your DNS provider’s site and create a new CNAME record.
- In the hostname field (or equivalent), enter the random value that you copied from your CertCentral account.
- In the record type field (or equivalent), select CNAME.
- In the target host field (or equivalent), enter dcv.digicert.com to point the CNAME record to dcv.digicert.com.
- Select a Time-to-Live (TTL) value or use your DNS provider's default value.
- Save the record.
How to Check if Your Record is Ready!
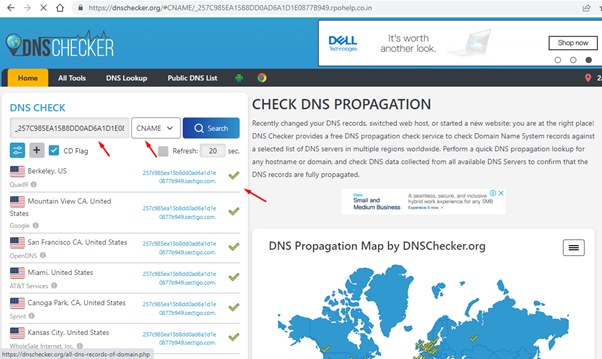
- Check if your CNAME record is validated using a DNS lookup tool like https://www.whatsmydns.net/. Enter the value from your Host Name field and select CNAME. If the "Points To" value is displayed with green check marks, your CNAME record is propagated, and your SSL should be issued soon.

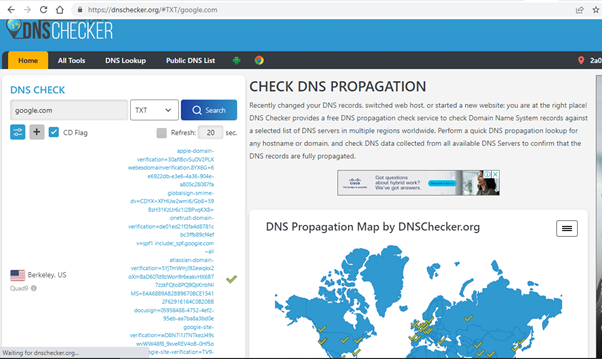
- To check if your TXT record has propagated, use a DNS record lookup tool such as https://www.whatsmydns.net. Input your domain and select TXT from the drop-down menu, then hit “Search”. If you can see your TXT record’s unique value with green check marks, your TXT record is propagated, and your SSL should be issued soon.

- HTTP/HTTPS File Verification
If you don’t have access to the DNS server to create the DNS record to complete the domain validation process you can choose HTTP record creation or .txt file upload to your website to complete the domain validation process.
Please note for wildcard certificates you must complete the domain validation process by creating DNS record or via Email validation, HTTP record or .txt file upload to your website is not available for the same.
Also, When requesting an SSL certificate for an IP address, DigiCert will only use file-based authentication for domain validation.