Certificate Signing Request (CSR) Generation Instructions for Zimbra 5.0.x, 6.0.x, & 7.0.x
Mar 26, 2026
Here are detailed instructions on how to generate a CSR for
Zimbra 5.0.x, 6.0.x, and 7.0.x
using the command line interface:
Method 1:
Generate CSR using the command line interface:
-
Log
in
to the Zimbra server as the "
zimbra
" user.
-
Switch
to the
Zimbra SSL
directory
by running the command "
cd /opt/zimbra/ssl/zimbra
".
-
Run
the command "
openssl
req -new -newkey rsa:2048 -nodes -keyout zimbra.key -out zimbra.csr
" to generate the private key and CSR.
-
Fill in the information prompted by the command, including the common name (i.e., the fully qualified domain name of the Zimbra server),
organizational unit
,
organization
,
city
,
state
, and
country
.
-
Press
enter
to skip the "
challenge password
" and "
optional company
name
" fields.
-
The
private key
and
CSR
files will be generated in the "
zimbra
" directory. The CSR file will be named "
zimbra.csr
" and the private key will be named "
zimbra
.key
".
-
Submit
the
CSR
file to the certificate authority for signing.
-
Once you receive the signed certificate, run the command "
openssl pkcs12 -export -in zimbra.crt -inkey zimbra.key -out zimbra.p12
" to
create
a
PKCS12
formatted certificate.
-
Run
the command "
keytool -importkeystore -srckeystore zimbra.p12 -srcstoretype PKCS12 -destkeystore /opt/zimbra/java/jre/lib/security/cacerts -deststoretype JKS
" to import the certificate into the
Zimbra
keystore
.
-
Restart
the
Zimbra
services for the changes to take effect.

Note:
Make sure to keep
the private key safe, don't share it or lost it.
Method 2:
To generate a CSR through the Zimbra admin console for versions 5.0.X, 6.0.X, and 7.0.X, you will need to follow these steps:
-
Log in to the
Zimbra admin
console
as an administrator.
-
Navigate
to the "
Configure
" section and click on "
Certificates
."
-
In the "
Certificate Signing Requests
" section, click on "
New
."
-
Fill in the required information, such as the
domain
name
and the
organization name
, and select the appropriate key size.
-
Click on "
Create
" to generate the CSR.
-
Once the CSR is generated, you will need to copy the contents of the CSR and submit it to your certificate authority (CA) for signing.
-
After the CA has signed your CSR, you will need to download the signed certificate and the intermediate certificate(s) from the CA.
-
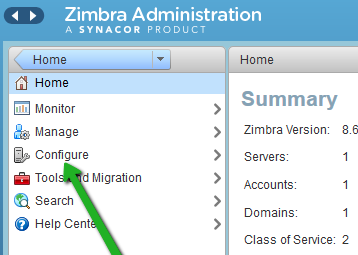
In the main menu, click Configure.
-
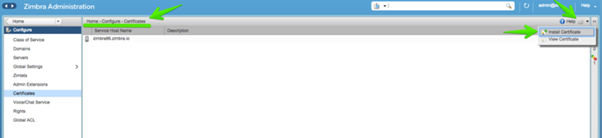
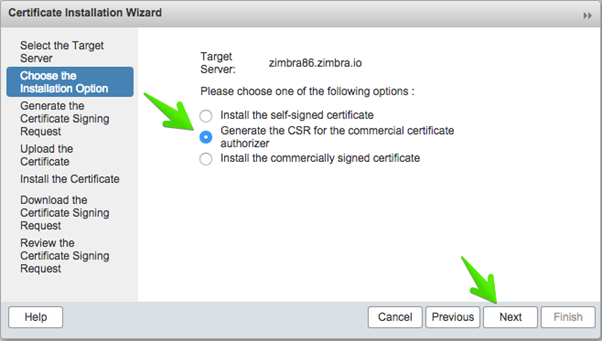
Select Certificates. Then, click the gear icon on the top right (next to Help) and select Install Certificate.
-
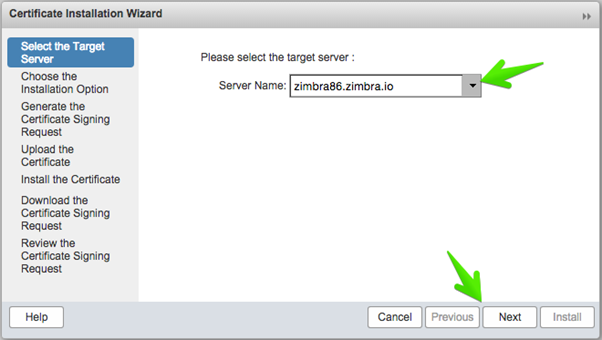
Select the target server to generate the SSL files like the CSR and the private key:
-
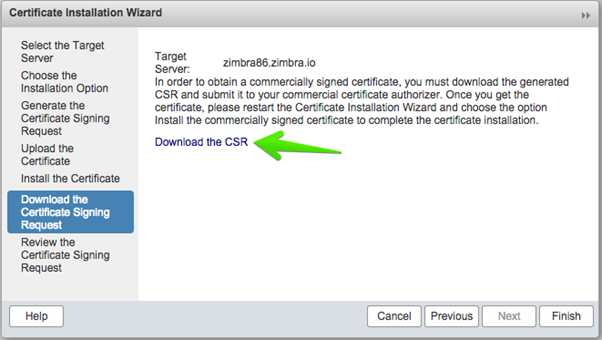
In the next step, select the option Generate the CSR for the commercial certificate authorizer
-
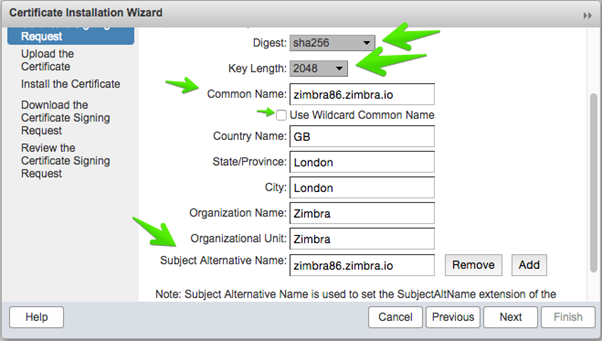
In this window, you need to select the next settings:
-
Select digest SHA256 or above, not SHA1 as is not longer considered to be secure
-
Key Length 2048 or above
-
Common Name (CN) needs to be the FQDN that you want to use, if you are using a Single-Server is recommended that the FQDN and the hostname are the same.
-
The checkbox about the Wildcard is if you want to use a Wildcard SSL certificate for your Zimbra, and for the rest of you other FQDN in your Company. If the hostname and the FQDN doesn't match, but are in the same domain, use this option and buy a Wildcard Certificate.
-
In the Subject Alternative Name (SAN), you can select another names if you will use a Multi-SAN SSL certificate, this option is indicated if you want to have mail.customer1.com, mail.customer2.com, etc.
-
You can download now the CSR file, ready to send to your SSL Certificate Provider, if you miss this step, you can find the csr file in the next path /opt/zimbra/ssl/zimbra/commercial/commercial.csr